Honda Manual Cam Chain Tensioner Decha - CJR Performance
Honda Manual Cam Chain Tensioner Decha - CJR Performance - Honda Grom/Monkey/Cub/CT125 is backordered and will ship as soon as it is back in stock.
Description
Description
If you're serious about making power, replacing your weak OEM cam chain tensioner is a must!
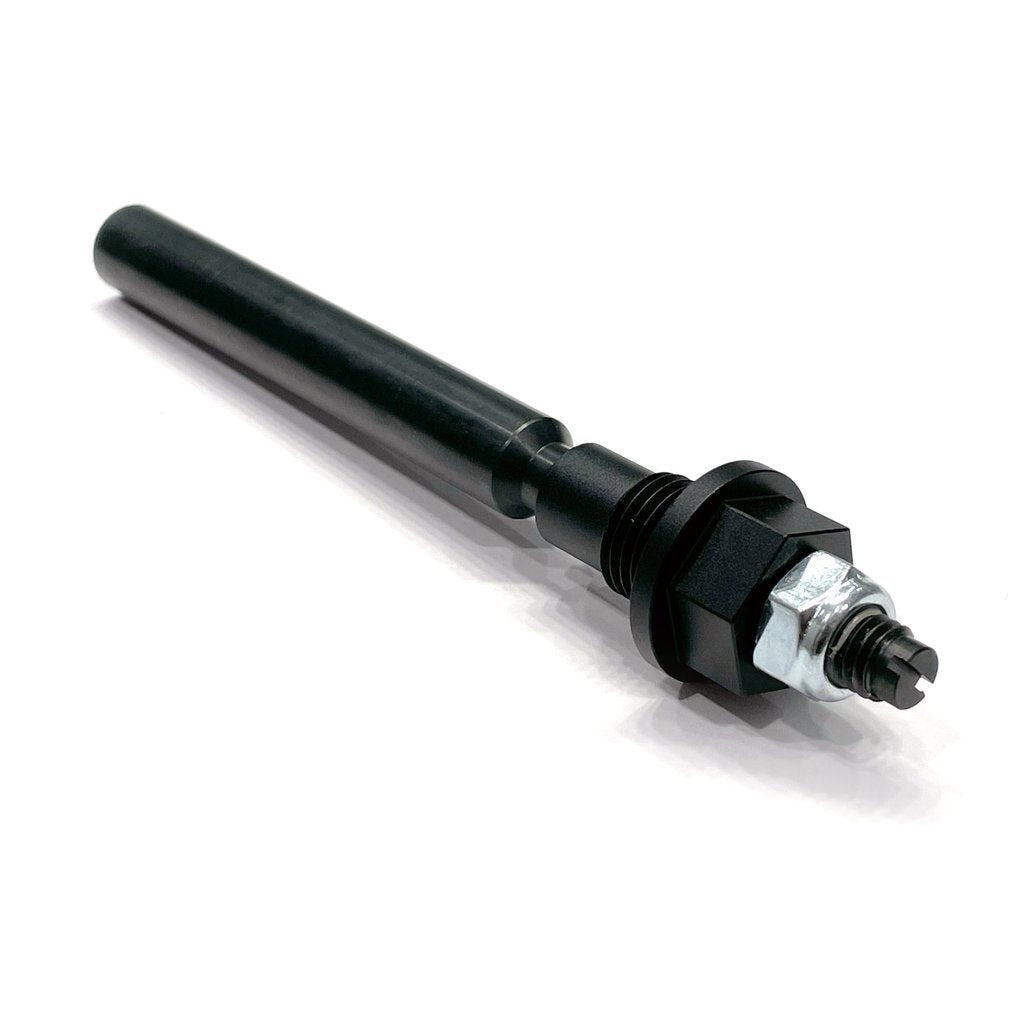
The Decha manual tensioner is a direct OEM replacement that provides reliable tension on your cam chain so there's no worry about chain slap or skipping teeth! The body is made of a hardened and coated steel for a long life, and includes two high quality o-rings for a great seal. Capture nut is of course anodized in black for a sleek look, with a nylon locking nut to top it off. Adjusting cam chain tension is as simple as a turn of a flat head screwdriver.
-Hardened and coated steel for durability
-Double o-rings for perfect seal
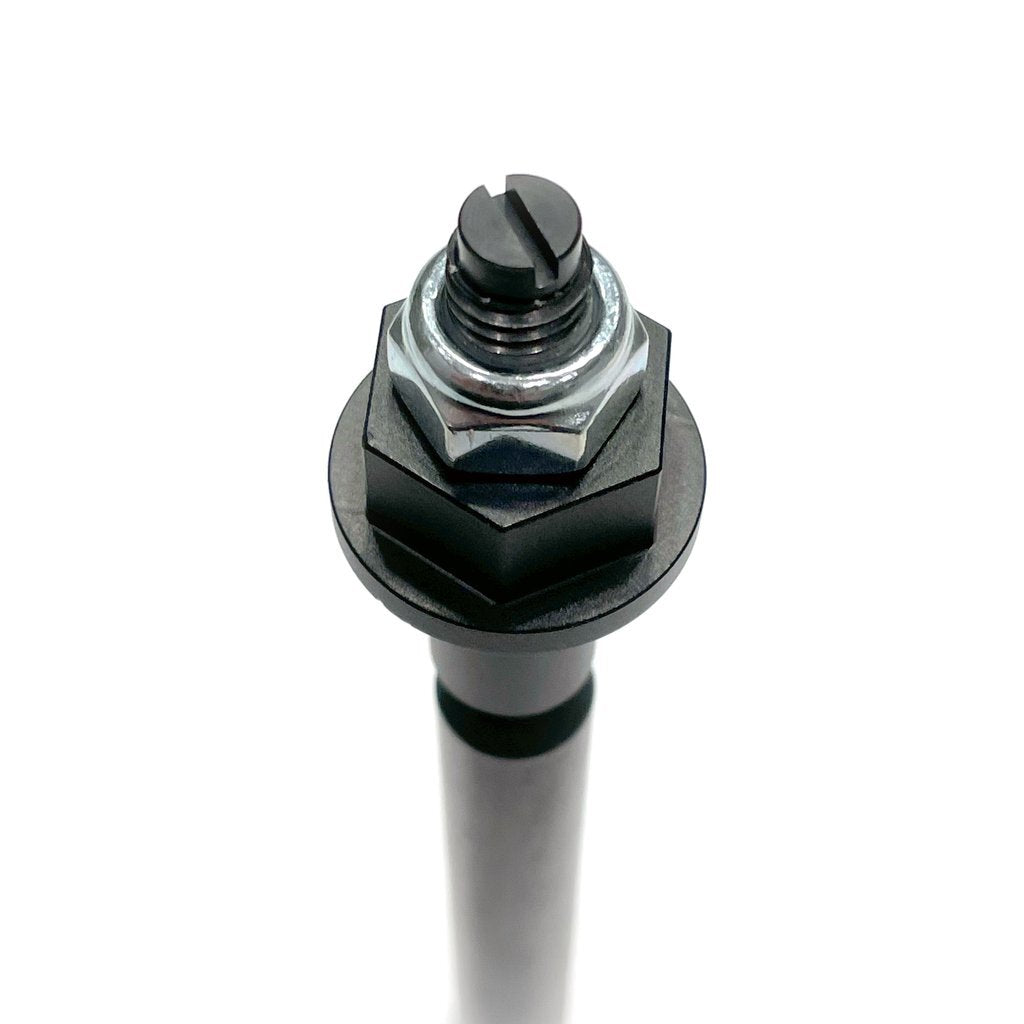
-Black anodized capture nut and nylon locking nut
-Direct replacement for OEM tensioner for MSX125, Grom, Monkey, Supercub125, CT125
-CRF110 option does utilize a shorter shaft design
-CRF110 does recess below the engine, recommended hole in the skid plate location for access to the adjuster. See image.
NOTE- Recommended to be used with CRF110 Cam Chain Guide, also recommended to be paired with Avail Motorsports Oil Pump Gear.
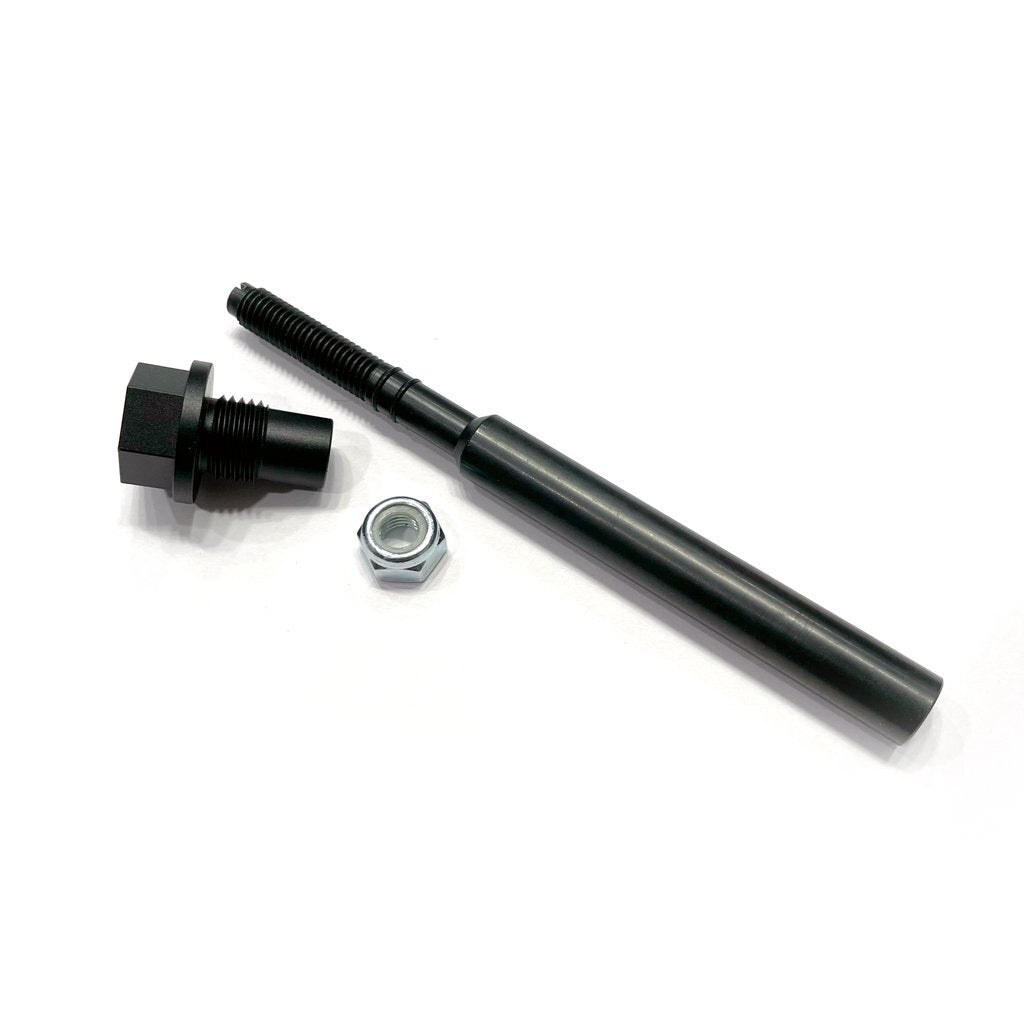
Assembly Instructions
- Add a small drop of oil onto the shaft and on the o-rings to lubricate for installation of the black fitting. Skipping this step may result in a torn o-ring.
- Install the (2) small o-rings onto the manual tensioner at the two notches above the threads by gently rolling them into place.
- Install the black fitting onto the bottom of the shaft with the nut facing down towards the small end, rotate this on as far as it will go to where the small end of the shaft sticks out the furthest. This would be the loosest setting once installed.
- Place lock nut onto shaft, keep loose until installed into the crankcase
Installation Instructions
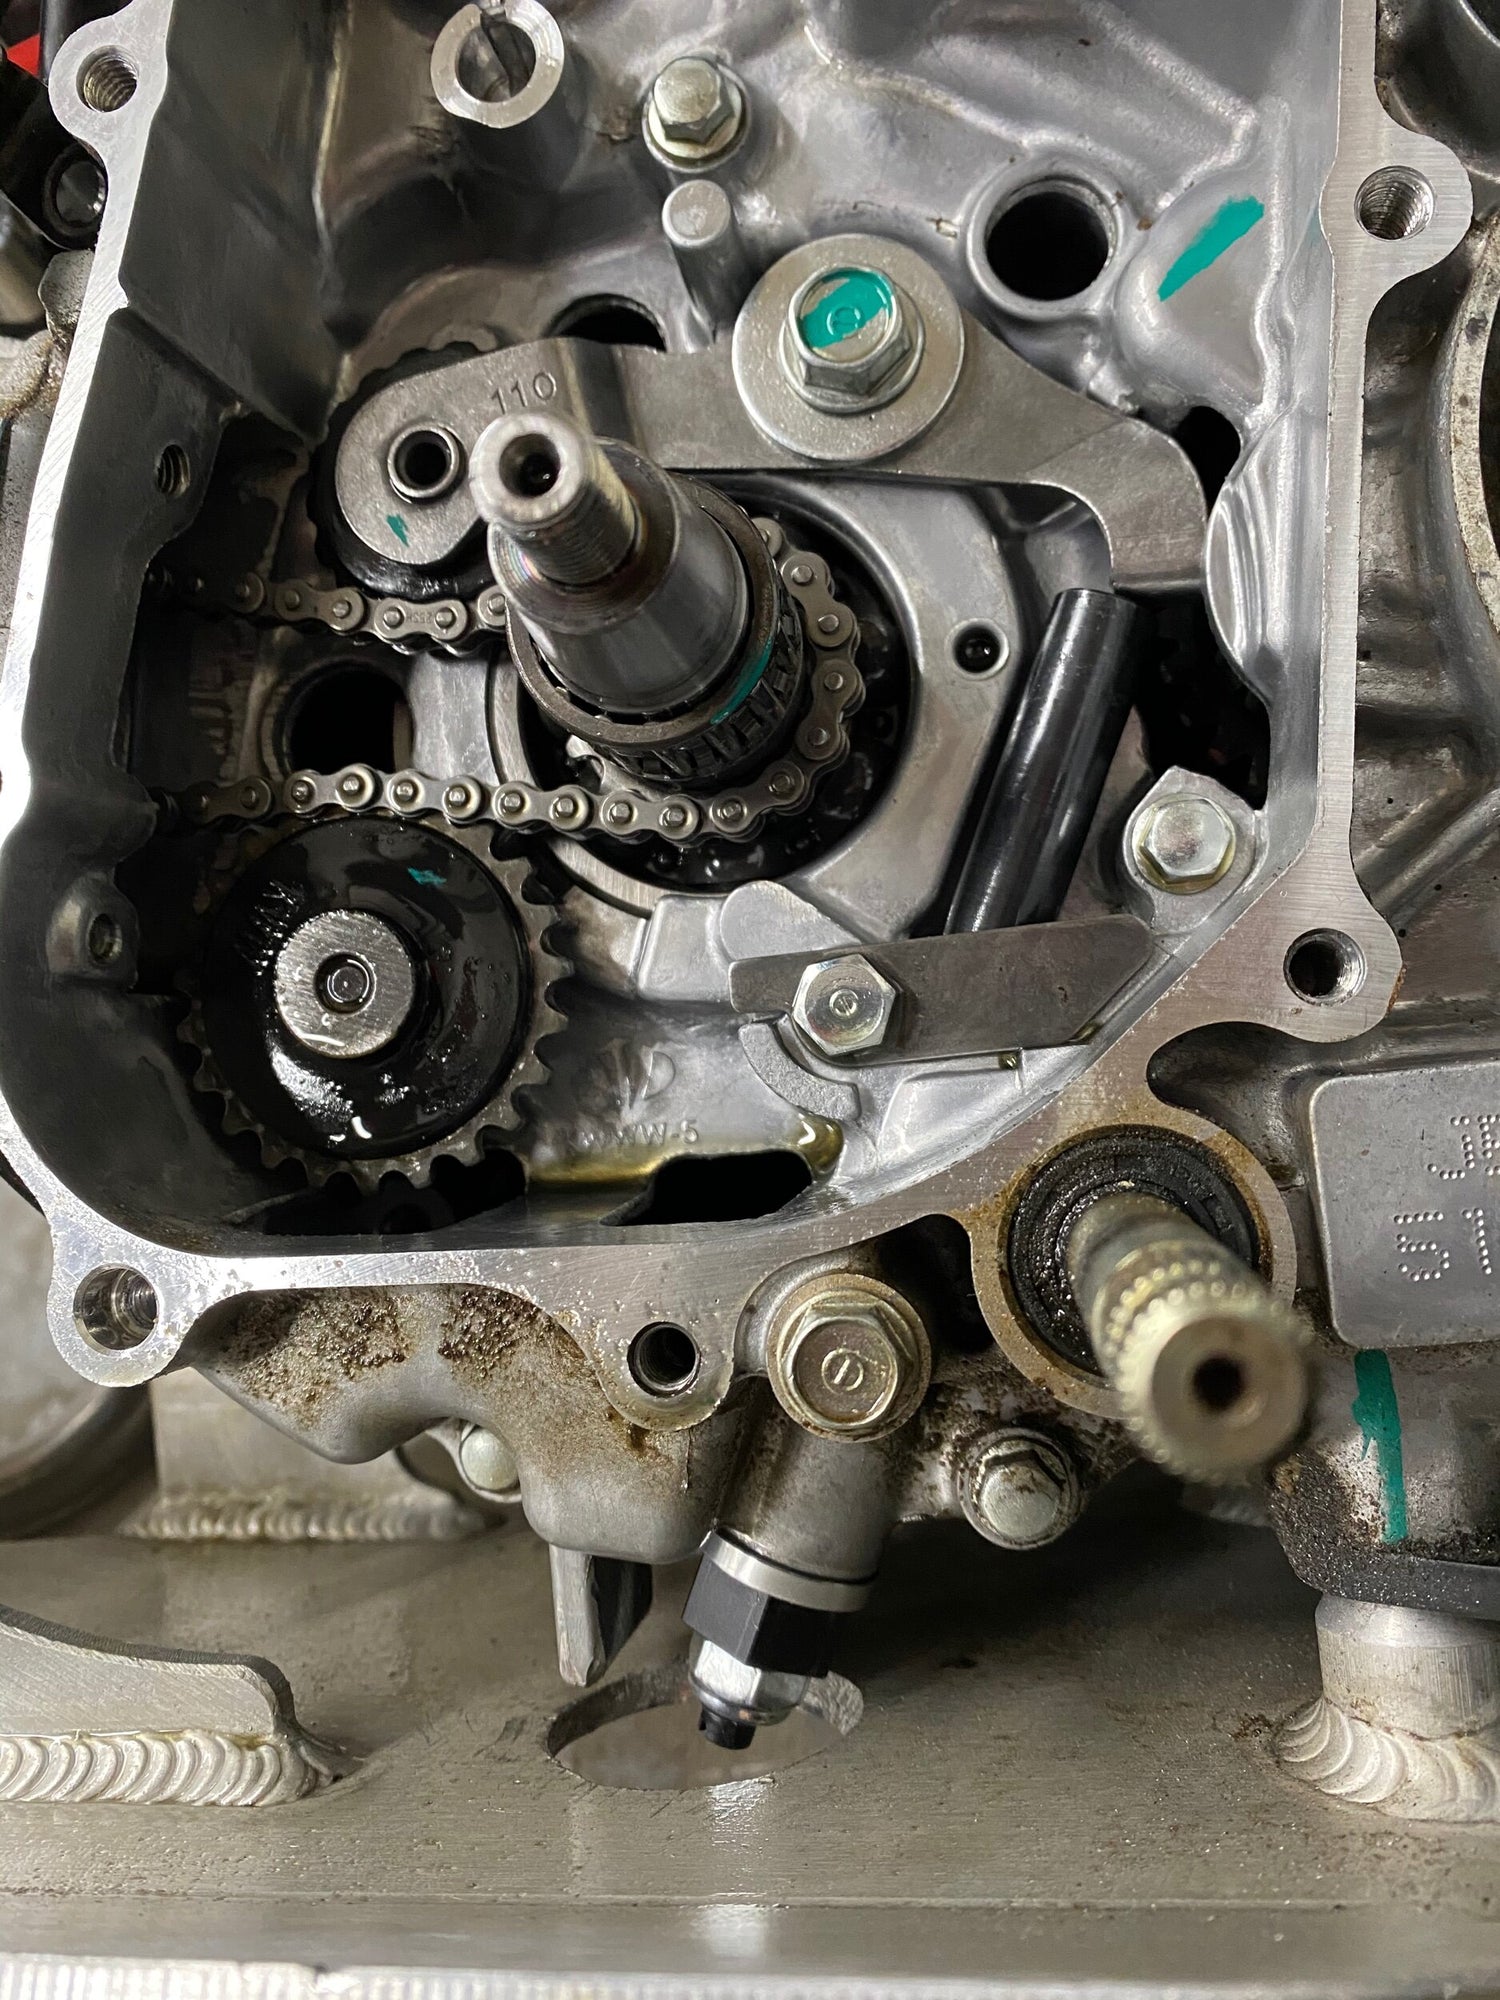
- Locate the OEM cam chain tensioner bolt at the bottom left side of the engine case. This is not to be confused with the oil drain plug.
- With a rag or drain pan handy to catch oil drip, remove the bolt slowly as a spring and shaft will fall out together. A small amount of oil coming out as well is completely normal.
- Install the crush washer from the OEM tensioner onto the shaft of the new manual tensioner
- Slide the tensioner into the crankcase, and tighten the 17mm black fitting nut.
- Using a flathead screwdriver, slowly turn the tensioner clockwise to bring tension to the chain. Once firm, back tension off the chain slightly and start the motorcycle.
- If you hear a tapping noise, the tensioner is slightly too loose and needs to be tightened further.
- If you hear a whining noise, the tensioner is too tight and needs to be loosened.
- Optimal setting would be as loose as possible without having any tapping noise.
- Once the optimal setting is in place, use the screwdriver to hold the shaft and tighten the locknut in place.
